What's in the Box:
- 1 x VPC Control Panel

- 1 x USB Cable
- 1 x OUT-AUX Cable 1m.
- 1 x OUT-AUX Cable 0,5m.
- 3 х Button Inlays Set
- 10 x Handle (including preinstalled)

Tools required:
- Wrench 8 mm (NOT INCLUDED)

- H2.5 Hex hey (NOT INCLUDED)

To replace the lever handles, remove the highlighted screws:

To adjust the axis lever force, remove the bottom cover by removing the highlighted screws:
Adjust the highlighted nuts with an 8mm spanner to adjust each lever. Hold the lever steady from the topside while adjusting the nuts:

Installing on VPC Desk Mount V3 - L/S/Mini
Tools required:
- H2.5 Hex hey (NOT INCLUDED)
- H4 Hex key (NOT INCLUDED)

1. Remove the side screws and remove the desktop legs


2. When using the VPC Control Panel attached to a VPC Desk Mount it is more convenient for the connectors to be at the bottom of the unit. To achieve this it is necessary to reorient the device housing. To do this, unscrew the 6 marked screws on the front.

3. Gently lift the top plate up and rotate the case 180 degrees.

Be Careful with the Internal Cabling!
4. Secure the top plate back to the housing with the highlighted screws. The connectors will now be at the bottom side of the device.
5. As shown in the figure below, fix the panel to the bracket on the left or right side using the screws that originally secured the desktop legs.

Additional mounting options using the VPC Desk Mount Adapter - Control Panel can be seen HERE
Attention! When fixing the device to a surface using holes with M5 nuts in the bottom cover, the screw-in depth should not exceed 12 mm. Failure to do so may damage the internal components of the device.
Select the correct screw length!

Inserting Button Inlays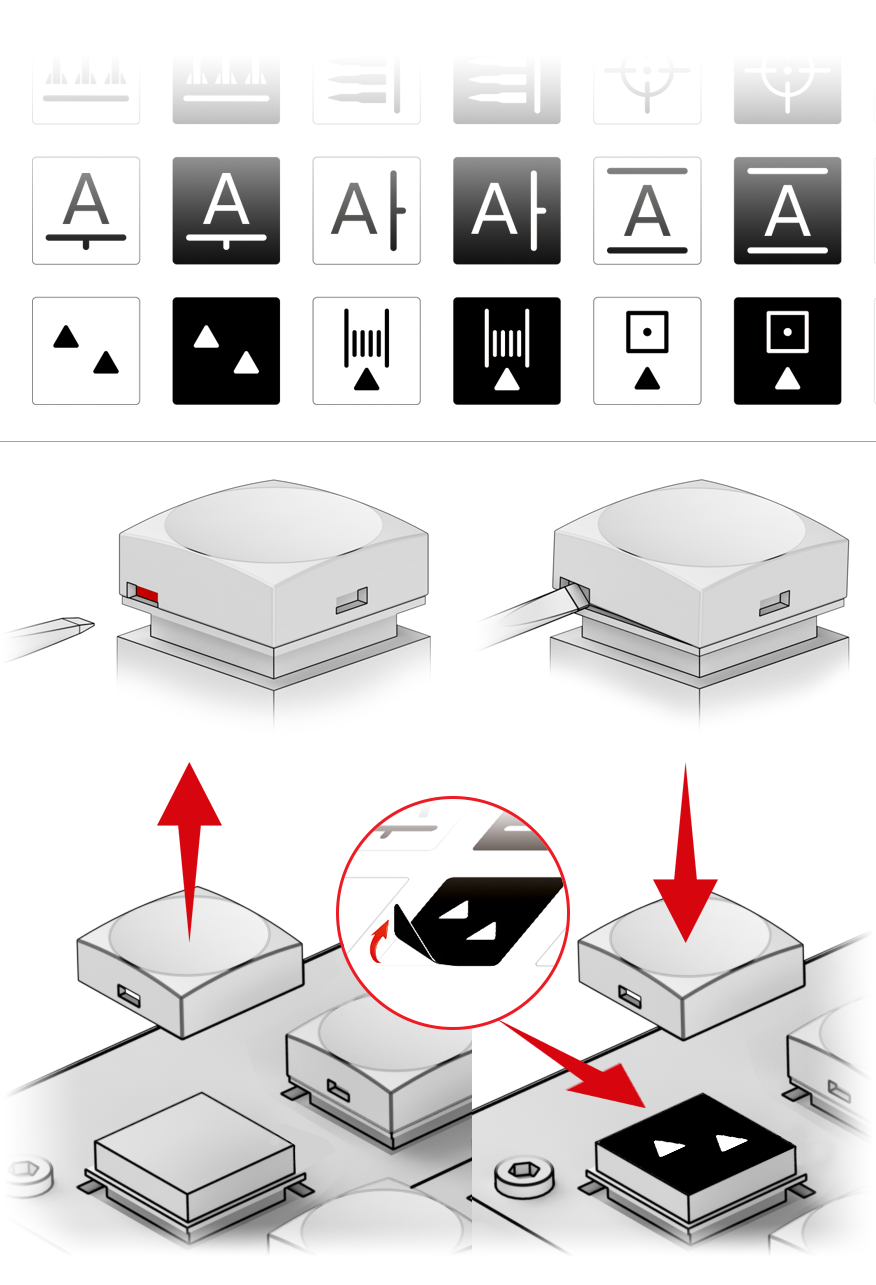
Device Connection
ATTENTION: Please ensure the correct cable-port connection is made (e.g. PC USB cable to device port labelled "USB"). Incorrect cable connection can lead to non-warranty damage to the device electronics.

IMPORTANT! Use VPC Software to configurate the device
Troubleshooting
Please visit the VIRPIL Controls support portal for troubleshooting advice. If you are still experiencing issues or unable to find answers to your specific question, please create a ticket on our support portal!
Was this article helpful?
That’s Great!
Thank you for your feedback
Sorry! We couldn't be helpful
Thank you for your feedback
Feedback sent
We appreciate your effort and will try to fix the article